


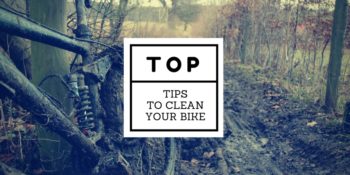
Top tips on how to really clean your mountain bike


Next up in our “How To”series is a topic we are all too familiar with, the gold old dirty mountain bike and how best to clean it. Obviously, your mountain bike will get dirtier over time, and especially fter a good session on a really muddy singletrack, but it is definitely worth the effort to keep your bike clean. A clean bike is easier to work on, and it will least you longer.
Everybody has differing cleaning schedules and needs based on how frequently they use the bike, and also what terrain they are riding on. There is no set schedule for how often you should clean your mountain bike, suffice to say that it should definitely be cleaned after any ride in wet or muddy conditions. We wil take you through some of our top tips to clean your mountain bike, although not all of the steps need to be followed for each clean.
When cleaning, its preferable to clean outside, and close to some form of drainage system. Always pick a hard surface to work on, and don’t be tempted to use a pressure washer as it can force water into places you don’t want it to go.
When washing your mountain bike use a standard hosepipe or a bucket with clean water. Coupled with some brushes and sponges, an old toothbrush can also really clean those difficult to reach parts.
So lets get onto the tips for cleaning the various components of your mountain bike.
Cleaning the frame and wheels
Take a bucket of water for rinsing, and using some brushes and sponges, start by cleaning the tyres and rims and hubs first. Always take care that you do not pour the water directly into the bearings. Next, remove both wheels from the bike, and work your way from the top of the bike dowanwads. Start with the saddle and seatpost, then clean the handlebars and then the top of the frame. For those awkward bits behind the chainset, use some brushes, whilst a piece of old cloth is excellent for getting behind the fork blades, seatstays and chainstays.
Cleaning the cassette
If you really want a thorough bike clean, it is recommended that the cassette is removed and given a deep clean by dismantling it and giving it a good old scrub. If you just want a quicker clean, just remove the wheels and clean the cassette in situ. To clean your bike’s cassette, we recommend a cassette-cleaning brush coupled with hot and soapy water. Give the sprockets a really good scrub to chase out dirt and oil from the hard to reach areas. Where you encounter really stubborn dirt and oil, a spray of degreaser followed by another scrubbing should do the trick. Once the cassette is cleaned up, wipe it with a rag or bike floss which will both dry it up and remove any remaining dirt.
Cleaning your bike chain
Cleaning your bike’s chain is a job everybody dreads but its actually quite simple with a chain cleaner box. First you need to put your bike level on a bike workstand, and then fit your chain cleaner box just in front of the rear derailleur.
Next, fill the chain cleaner box with biodegradeable degreaser, or if you don’t have that, some white spirit. Once filled and attached, slowly rotate the pedals backwards whilst holding the box in position. Once you see that there is no more dirt or oil on the chain, then you can remove the chain cleaner box.
For really stubborn dirt or extremely dirty chains, you can simply remove the box, throw away the contents, refill and repeat.
Once you have completed cleaning with the chain cleaner box, you can finish off the job by holding the chain in the lower run with some kitchen roll or even an old rag and just rotate the pedals to wipe off any excess cleaner. You should then just leave the chain to dry up for a few hours.
Cleaning mountain bike components
An old electric toothbrush is really efficient at cleaning those difficult to reach areas. For oily or greasy parts, you can use a spray-on degreaser. When cleaning the components, you need to have a specific plan in place, so work methodically. Start with the brakes, then move onto the lower headset bearing area, then the chainwheels and around the cranks. After those areas, move onto the front and rear derailleurs, but don’t forget the derailleur cage. For these components, you should be able to clean them all without resorting to dismantling your bike. For those areas with caked-on grease and oil, apply some degreaser and finally just give components a rinse with some fresh water.
Lube the moving parts
After all the cleaning and degreasing of your mountain bike parts, its important to make sure those parts that are supposed to move freely can do so easily. Spread sheets of old newspaper over chainstays and then lubricate each link on the inside of the chain with a quality chain lubricant. Wipe off the excess. Remove stem bolts and smear the threads with anti-seize grease. Remove the seat post fixing bolt and grease the threads. Finally apply a light lubricant to both the front and rear derailleur pivots.
And you’re done! And you thought cleaning your mountain bike was so hard…